It’s the most wonderful time of the year…well almost! And, you know what that means? Time for lots of holiday cheer and DIY projects. This year, I am kicking off my holiday posting with a Holiday Business Thank You Card. It is non-traditional in the sense that it uses colors and paper that are unique to my business and not the holiday season. However, the images are definitely holiday. You can use the Cricut to create amazing projects that are unique and fun!
So let’s get started!
First, you can access this project here in Cricut Design Space if you want to follow along with the tutorial.
Project Level: Easy/Beginner
What you will need:
- Cricut Explore Air
- Cricut Design Space
- Cricut Glitter Pen
- Your choice of paper. Three different styles
- Glue (I prefer the Tombow Dual Tip Glue Pen) or adhesive of choice
Next, click make it in Cricut Design Space:

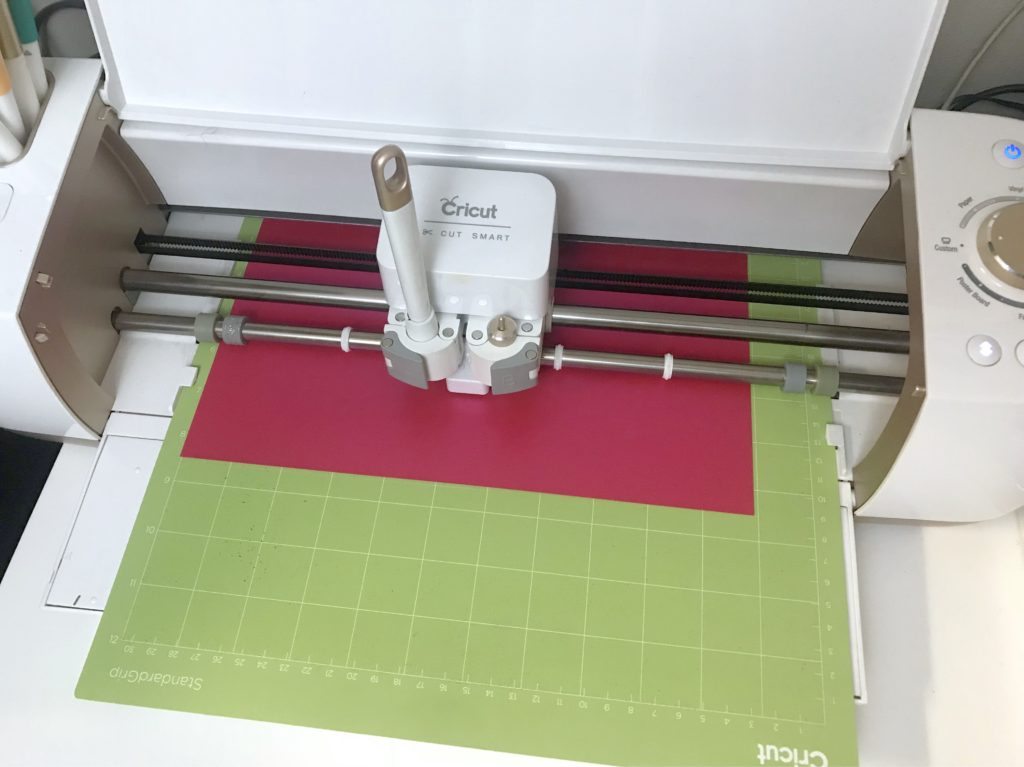
Follow the prompts on the screen. In this project we will switch out the scoring tool and the Cricut Glitter Pen. The directions will tell you when to switch the tools out. I opted to cut the card first.
Once you are prompted, switch the tool to the Glitter Pen.
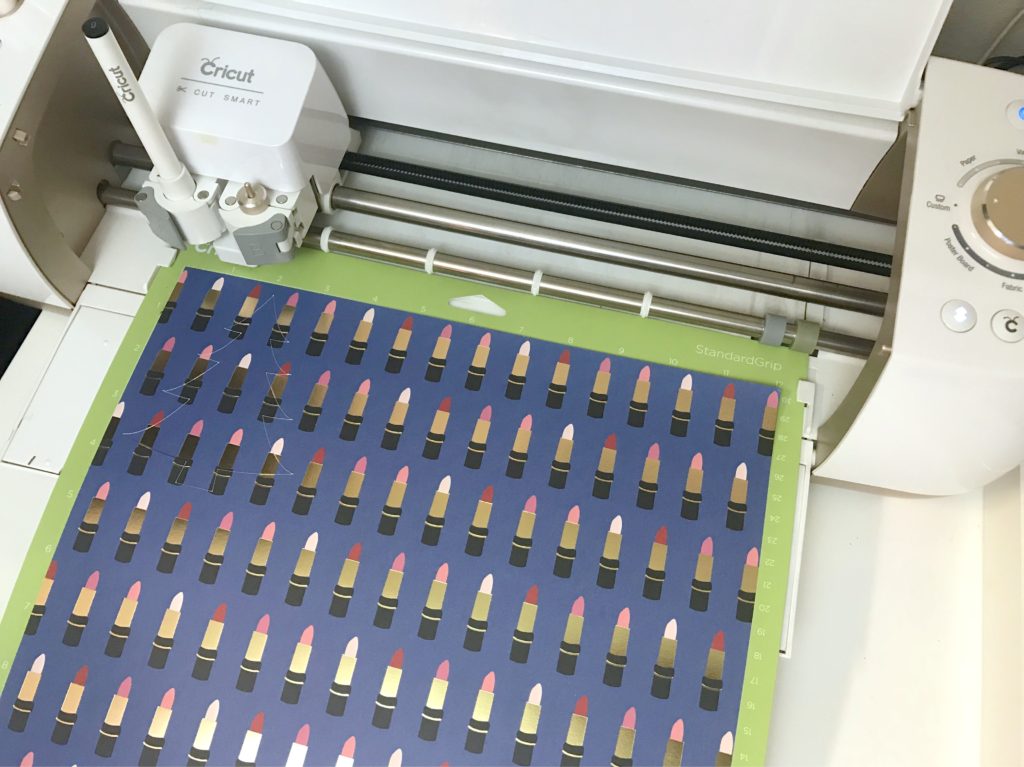
The next mat I chose to cut is the Christmas Tree. You can change the order by clicking on the Mat during the Make It process. I used the Oh Elle Paper Pack from Hobby Lobby to cut the Christmas Tree using the lipstick pattern.
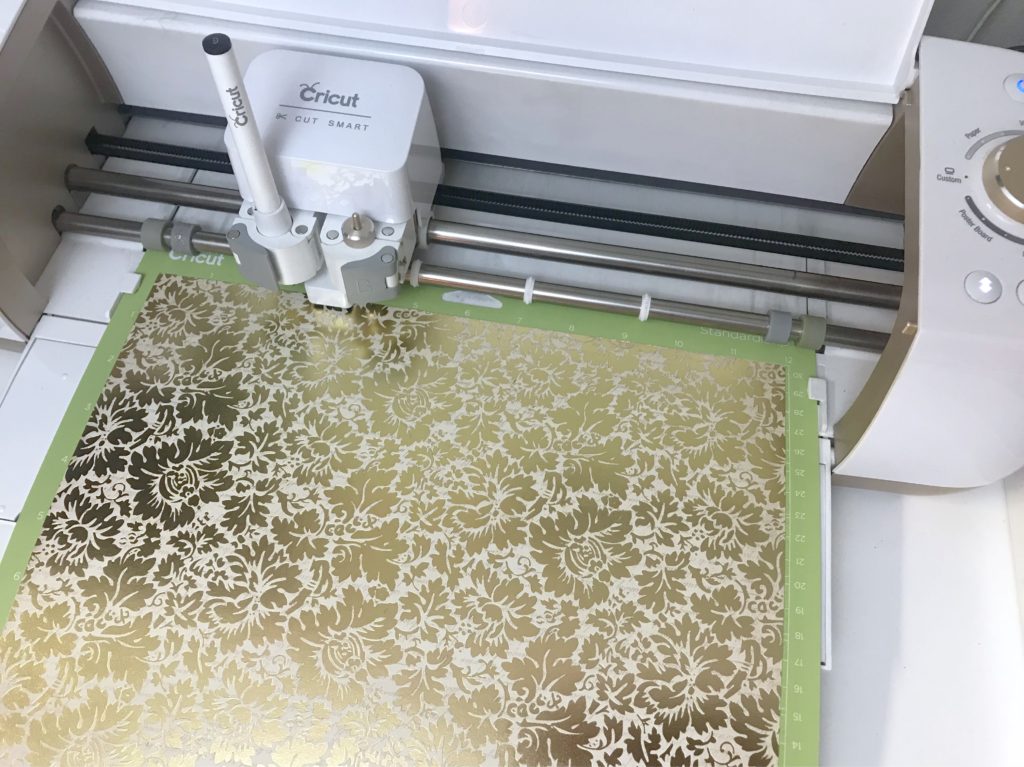
Next, I used some gold-foiled paper to cut out the sassy lady.
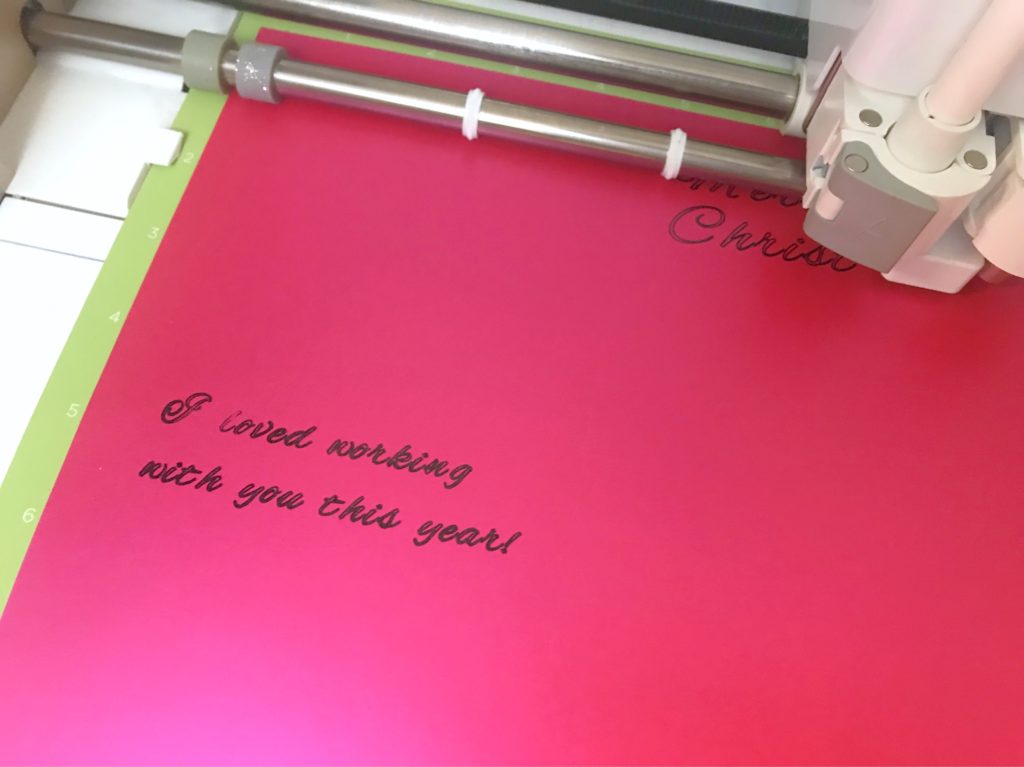
While all the other cuts were going on, I let the writing dry a bit since I used a pink paper that had a bit of sheen to it. Once the writing is dry, adhere the tree under the words, “Merry Christmas.” I love the Tombow Mono Liquid Glue Pictured.
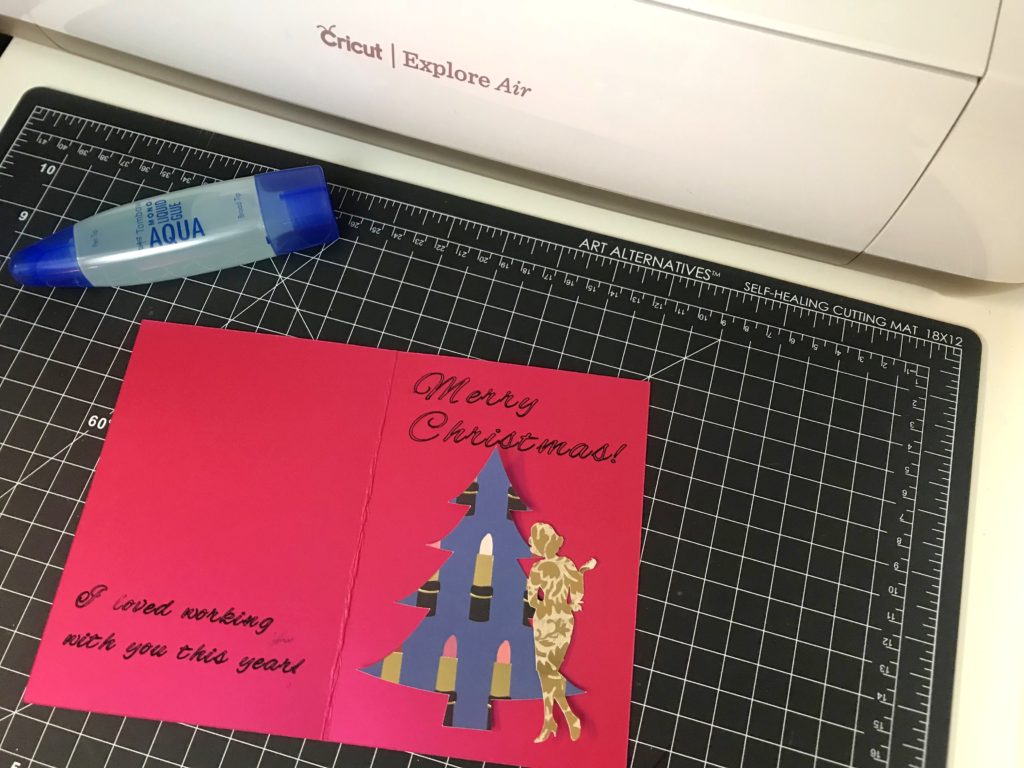
Voilá! You have such a cute, unique Christmas card for your business. *Side note: Besides crafting, I work with a lot of beauty and lifestyle brands. So this card fits my brand really well. You can change this up to be more DIY related, tech related or whatever business you are in.


4 comments
Thanks for joining in!
You are so welcome! Thank you for organizing! XOXOXO