Fall is in the air and you know what that means!
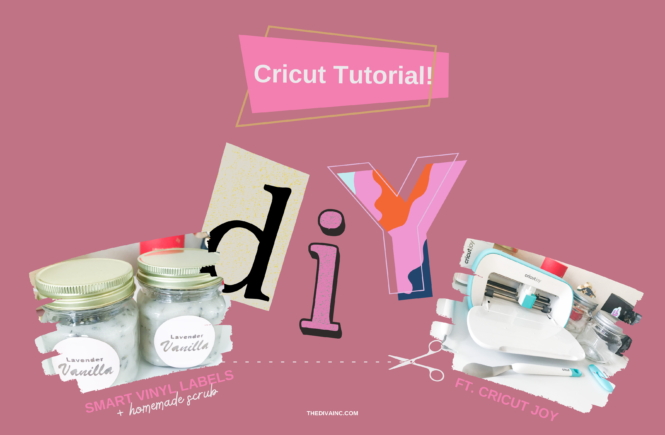
We will have tons of DIYs, Apple Ciders and fun articles for you in The Diva Inc. Magazine. We are kicking off Fall with this fun Cricut tutorial featuring the new Cricut EasyPress 2.
If you are a returning reader, you have seen me feature the original Cricut EasyPress many times. Well this time, Cricut has developed the EasyPress 2 in three sizes: 6×7, 9×9, and 12×10. For this tutorial, we are using the 9×9 to make a Fall Makeup bag. Of course you can also use this bag to store your Cricut tools.
What you will need:
- Cricut Explore Air
- Cricut EasyPress 2 (9×9)
- Cricut Weeding Tools
- Cricut EasyPress Mat
- Cricut BrightPad
- Cricut Iron-on
To access this file in Cricut Design Space click here.
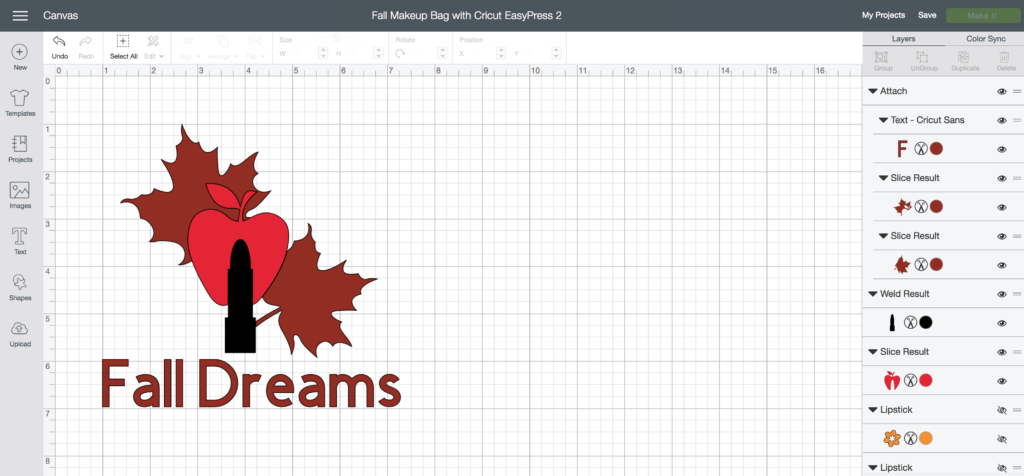
This project is already sliced and ready to make. Cricut does not recommend layering Cricut Glitter Iron-on directly on top of each other. Therefore the images used in this project have been sliced so that the glitter is not layered.
After opening the project, click the “Make It” button.
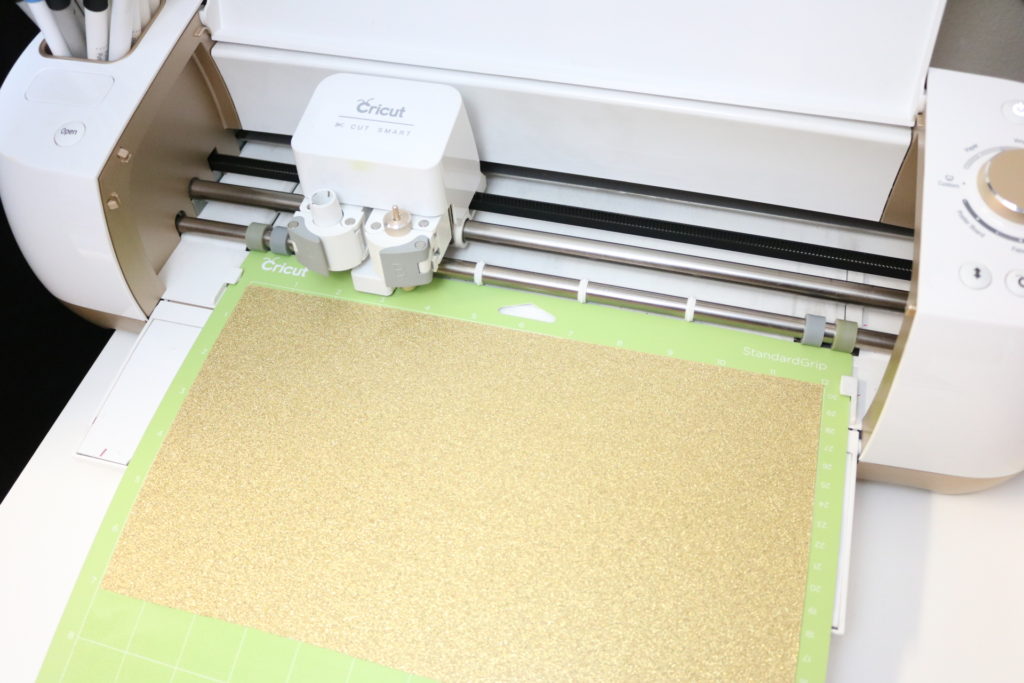
*Crafty Diva Tip* I always like to use every bit of Iron-on material I have. So it doesn’t matter if the material doesn’t go across the entire mat. I only use what is necessary to make the project. This way, I do not waste any usable material.
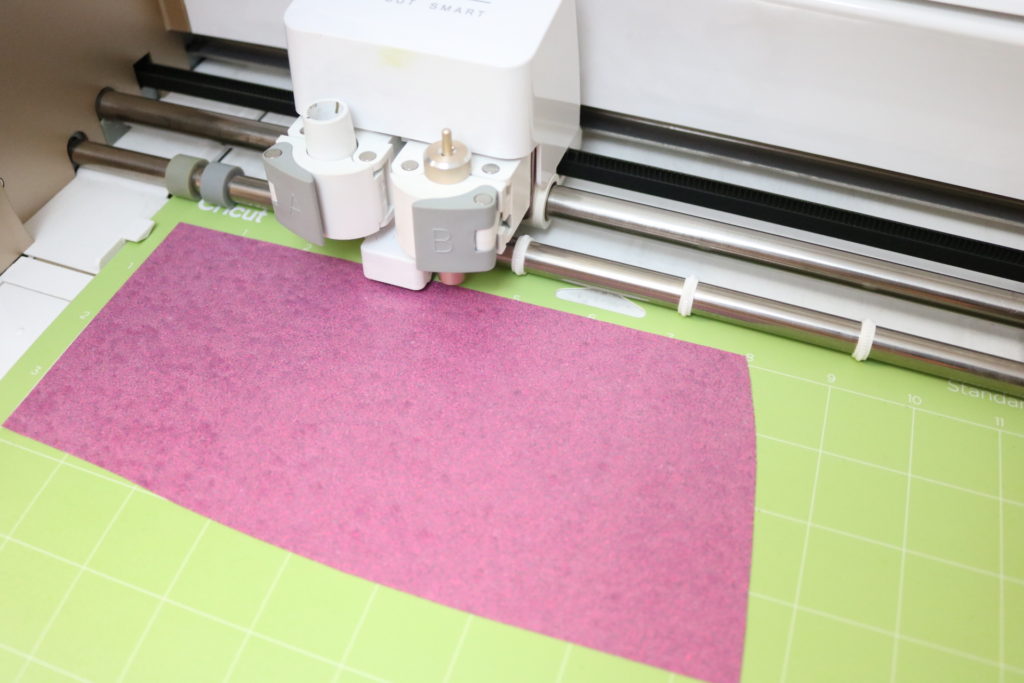
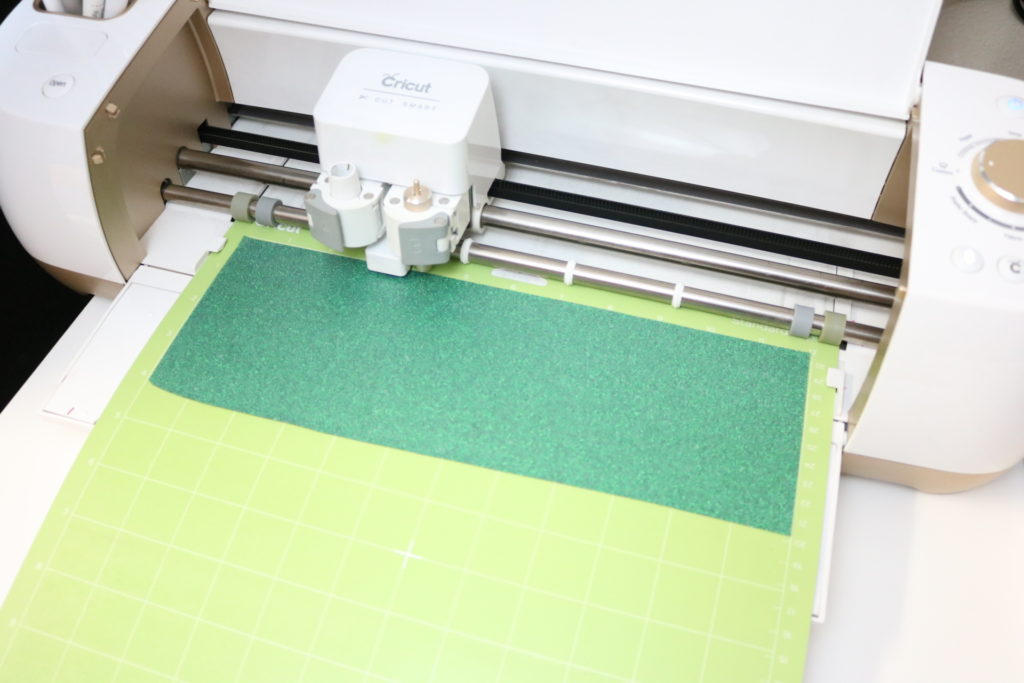
Next, load your Cricut Glitter Iron-on shiny side down on the standard grip mat. For this project, I used the Gold for the leaves and text, the green for the apple and the pink for the lipstick.
When your project is finished cutting, move on to the weeding process.
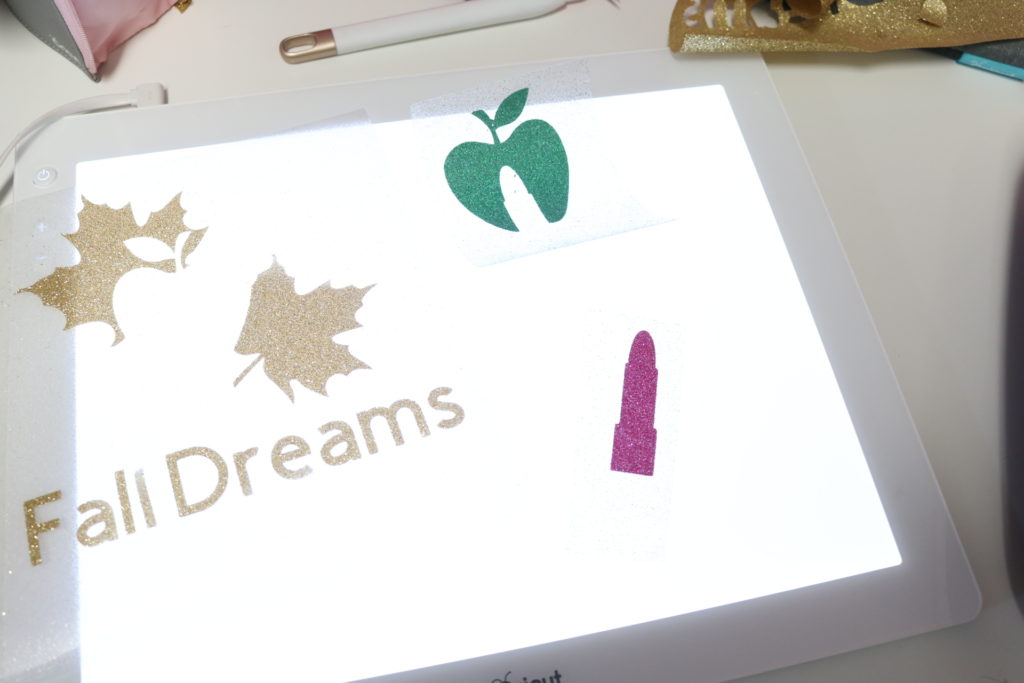
This is my favorite part.
After you have used the Cricut Explore Air to cut out your images, then carefully peel back the iron-on off of the transfer tape. Next, use the Cricut BrightPad to weed your shapes.
Having the BrightPad is a tremendous help in viewing the cut lines on the iron-on. Use your weeding tools to get in the middle of the words and those hard to see lines.
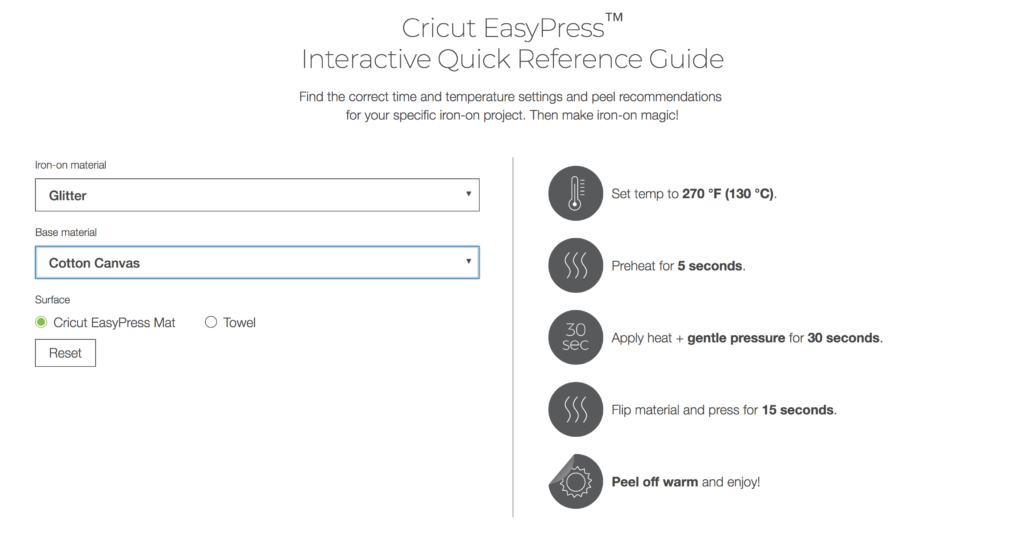 After weeding, I hopped on to Cricut’s website to make sure I used the correct settings for the new Cricut EasyPress 2.
Click the dropdown menu and choose your material, base material (in this case cotton canvas) and your surface (Cricut EasyPress Mat). Then follow the settings on the right.
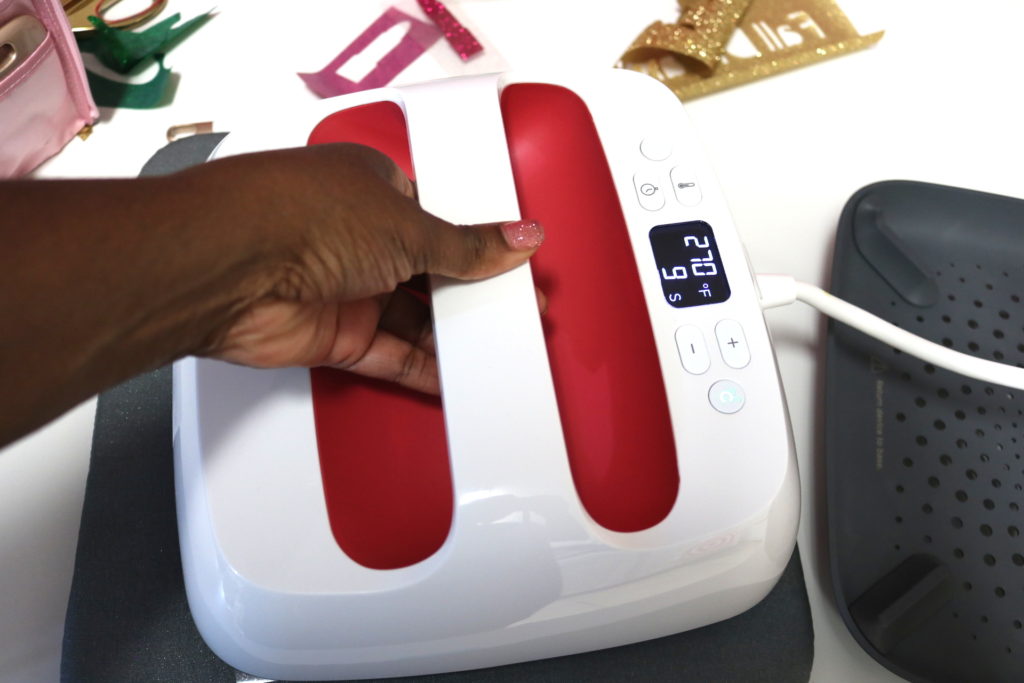
The Cricut EasyPress 2 is just as easy to use as the first generation EasyPress and it heats up amazingly fast. With just a few clicks you will be able to set the timer and temperature. The digital display makes it a no fuss, easy to read simple way to make sure you have a professional iron-on project in 60 seconds or less.
Follow the settings above and place the leaves and text first (gold iron-on) on your surface. For this project I am using a striped canvas bag. Next, place the apple (green iron-on) inside the leaves. Once you are happy with the placement, use the Cricut EasyPress 2 to apply heat. Lastly, place the lipstick (pink iron-on) in its spot and again use the Cricut EasyPress 2 to adhere the iron-on to the material.
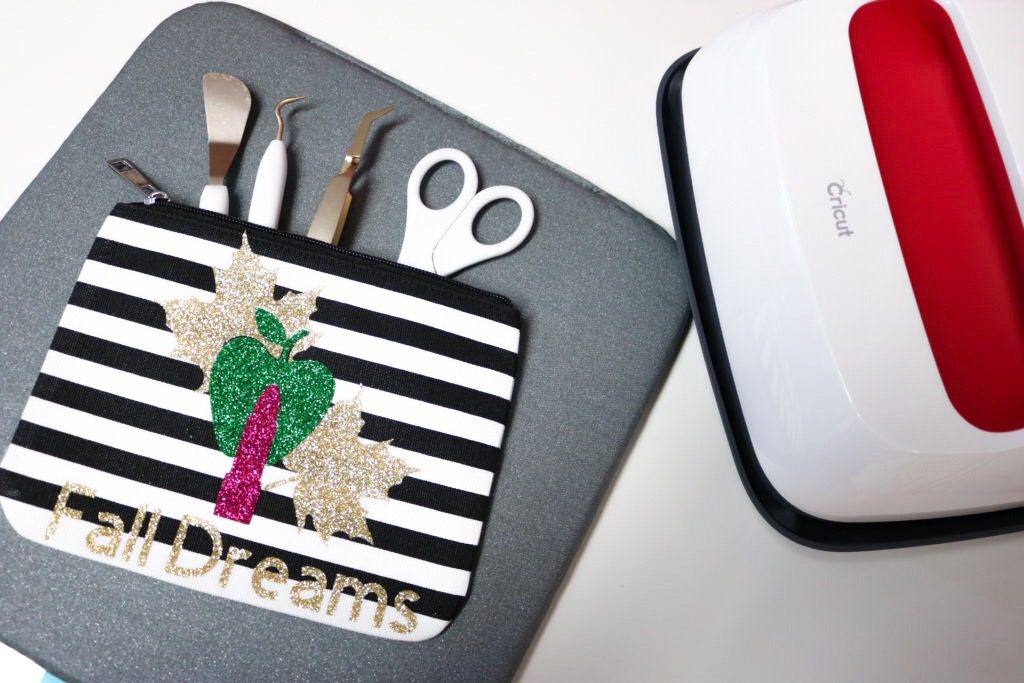
Voilà! Now your makeup, pencils or Cricut tools are ready for fall. Happy Fall dreams!
P.S. I know a lot of you have asked how the Cricut iron-on washes. I can assure you, I have never had a problem with the iron-on in the wash. And as a matter of fact, Cricut has a StrongBond™ guarantee on many of the iron-on materials. What that means is that if you use the product as directed, you should have no issue with the results. If you are not satisfied after that, Cricut will replace it for free. How awesome is that. But like I said before, I have not had an issue with the iron-on in the wash.
XOXOXO
Be sure to let me know if you try this tutorial. Use #TheDivaIncMagazine
Email The Diva Inc. Magazine at info@thedivainc.com or snail mail us at: PO BOX 1353, Palo Alto, CA 94302.
This is a sponsored conversation written by me on behalf of Cricut. The opinions and text are all mine.

1 comment