Can you believe 2017 has almost come to an end? This year has gone by faster than the blink of an eye! With a new year comes new goals, new opportunities and a new outlook on life. One of my goals for 2018 is to create more DIY projects. I absolutely love to sit down and create. Whether drawing, crafting or planning, the act of creating always brings me joy and peace.
So I am kicking off this goal early and showing you how to create fun DIY stickers for your planner or bullet journal using the Cricut Explore Air and Cricut Design Space. You can get access to this already formatted sticker sheet here if you want to follow along with the tutorial. These stickers are designed for the Day Designer by Whitney English. However, you can use these steps to customize stickers for the planner you are using.
What you will need:
- Cricut Explore Air
- Cricut Sticker Paper
- Cricut Design Space –
- A printer (laser or inkjet)
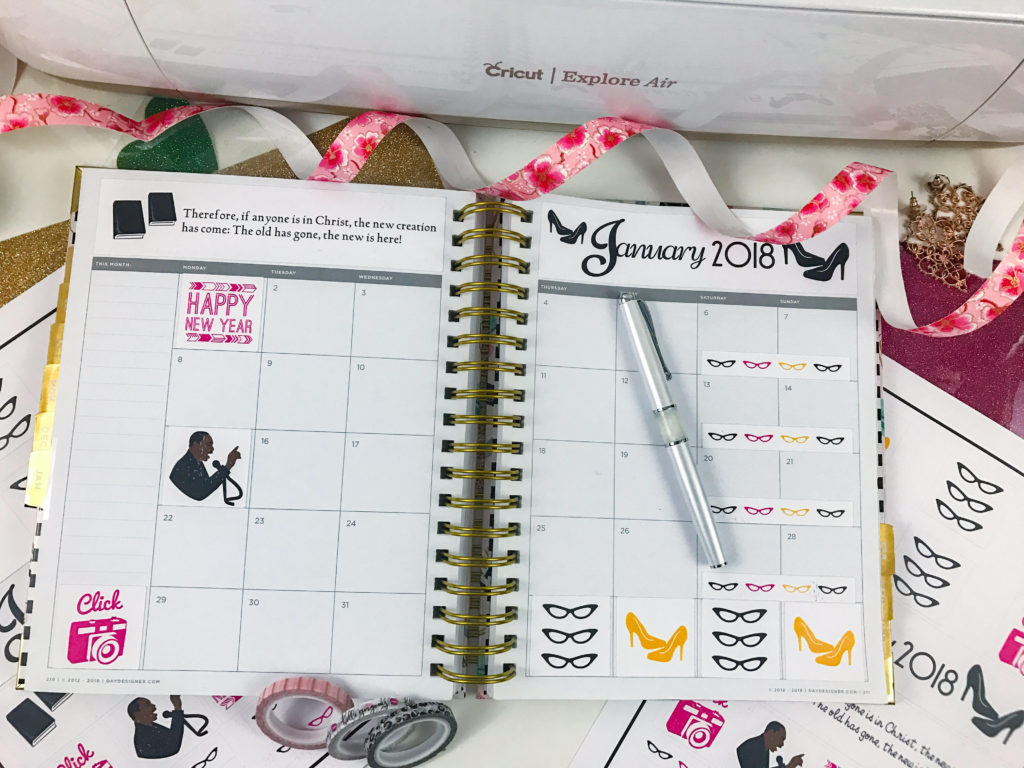
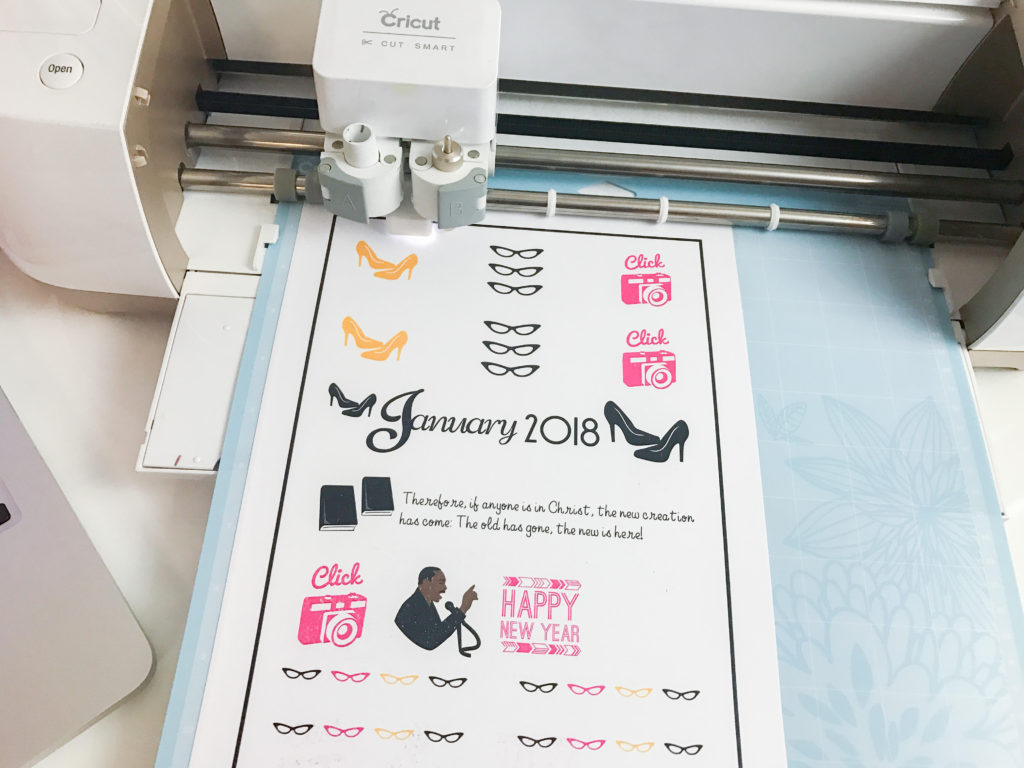
First, measure the boxes in your planner and the space that you want to place stickers. For this project I wanted to create my own month text (covering up the January 2018 title that is in the Day Designer), a space for a Bible verse on the opposite month page view, January holiday stickers (one for the new year and one for the Martin Luther King, Jr. holiday) and some fun stickers that speak to my personality. I measured each space in the Day Designer as follows:
- Month Banner/Bible Verse 6″(w) x 1.5″ (h)
- Holiday/Month Boxes 1.5″(w) x 1.4375″(h)
- Weekend Banners 3″(w) x .5″(h)
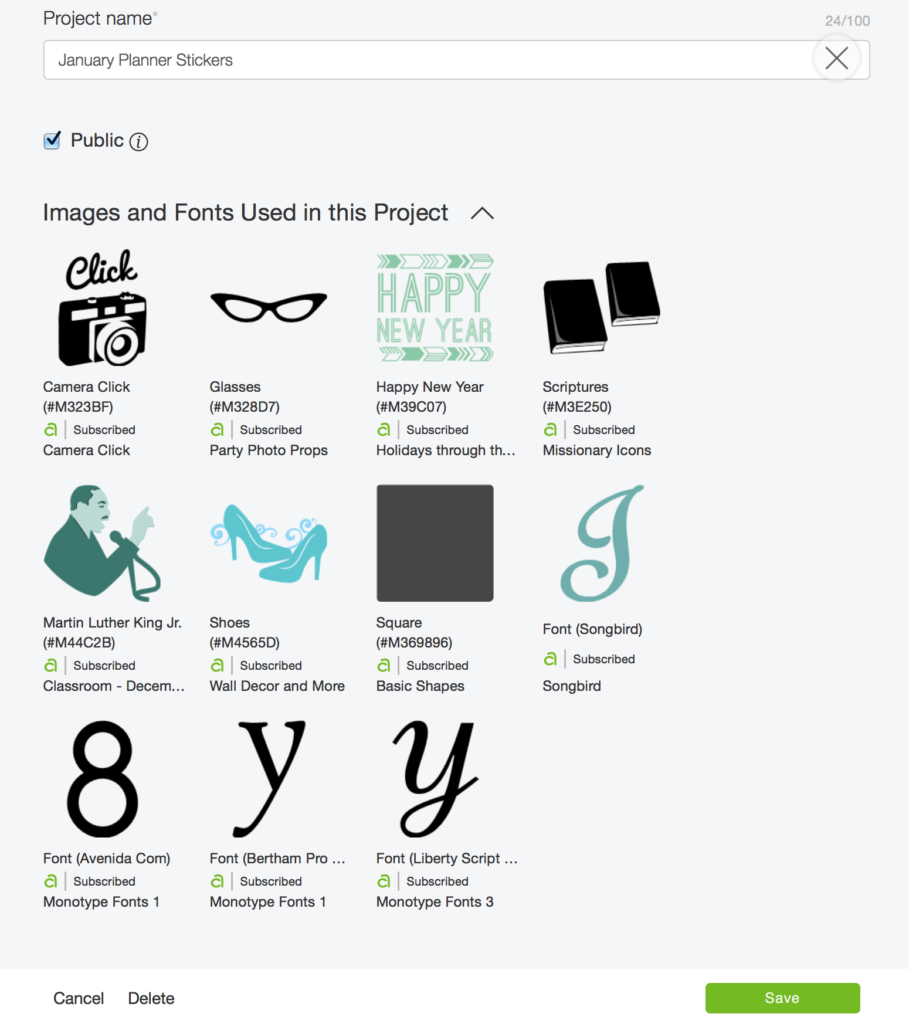
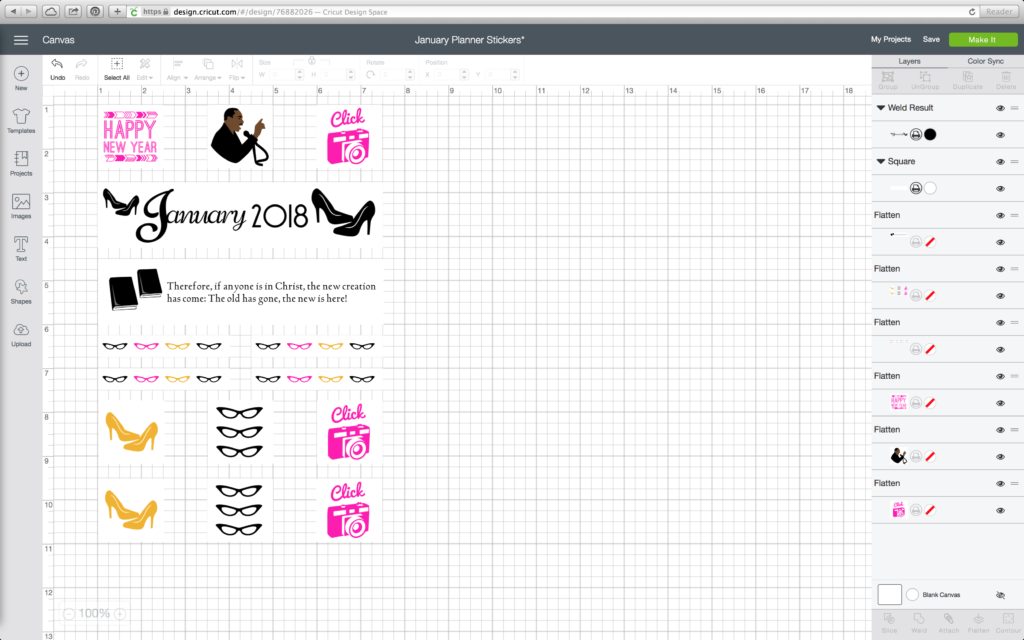
Next, using Cricut Design Space pick the images you want to use. If you are using the sticker file I created, the images and fonts are listed for you when you click the arrow next to “Images and Fonts Used in this Project.”
Setting up your Images
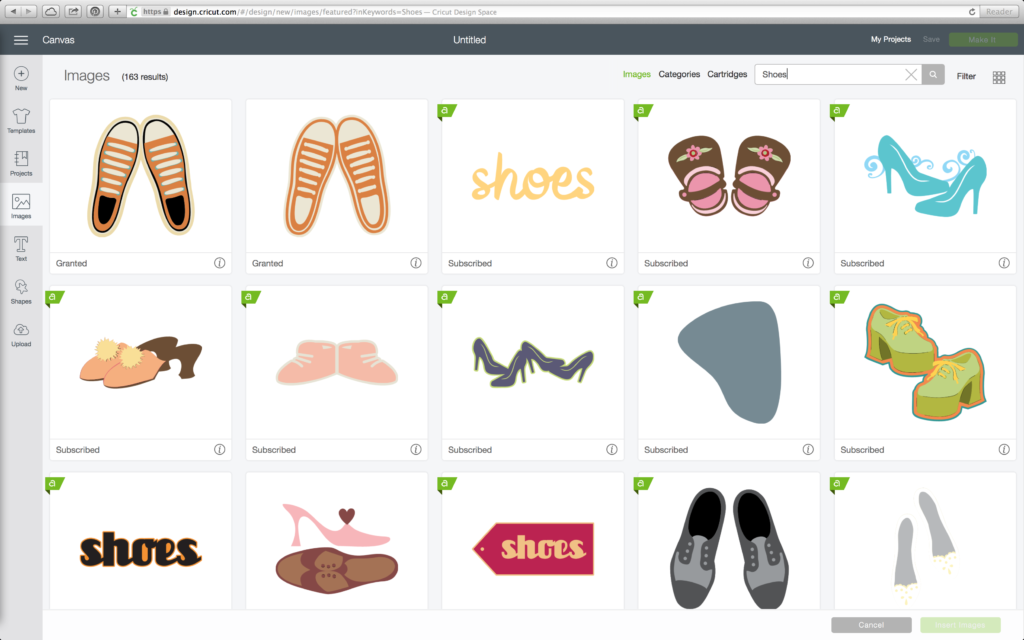
You can find each one of these images by clicking on Image > then searching by category. For example, when I was looking for the high heels I put in “shoes” and then picked the shoes that fit the project.
Repeat this process until all the images are on the canvas.
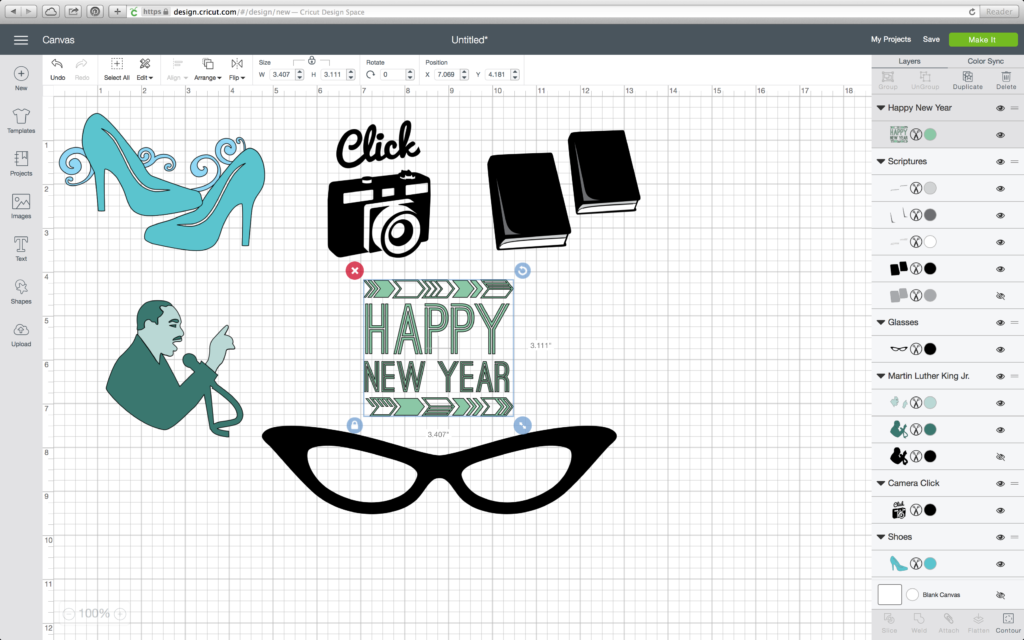
After all the images are placed on the canvas, manipulate them for printing. I chose to go with a Pink, Yellow and Black color scheme. Change the color of a layer by clicking on the colored circle next to the layer. Click the eye to hide layers. For the shoes, I ended up removing the background by clicking on the shoe layer and then clicking on the eye (beside the background layer). This made the shoes have no background which is what I wanted. I also turned the skin color of Martin Luther King, Jr. to brown and his clothing black. The camera icon and Happy New Year were changed to my favorite color – Pink!

Working with Fonts
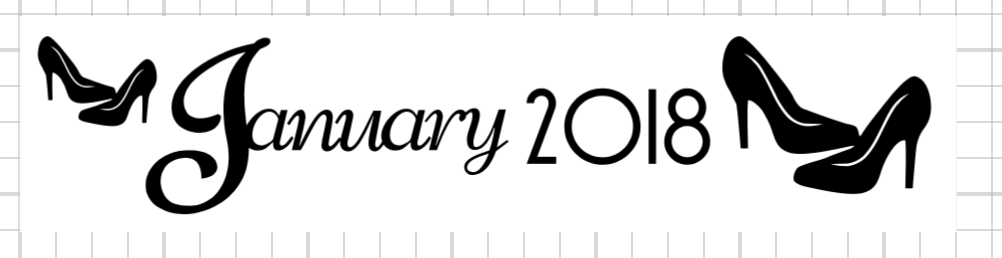
Move your images to the side for a bit so that you can work with text. Create the banner that says January 2018. Cricut Design Space has a plethora of fonts to choose from. For this project, I used a total of four fonts. The “J” is Songbird. The “anuary” is Liberty Script. The font for “2018” is Avenida. The last font I used is for the Bible Verse text and that is called, Bertham Pro. Because we will need to flatten the fonts later, it will be important to choose fonts that can be flattened. Highlight the text to see if the flatten tool his grayed out. If it is grayed out, then the font cannot be flattened. For the purpose of this tutorial, you will want to choose fonts and images that can be flattened.
Connecting Letters
For the banner text, use the weld tool to combine the “J” with “anuary.”
In case you haven’t used the weld tool, it is super easy. Once you have placed together the items you want to weld, then go to the bottom right of the side bar and click “Weld.” Make sure that both items are highlighted so they will weld together. This can be used for images and shapes as well.
Getting the Images Ready for Cutting
Now that the banner text is created, resize the images and banners based on the measurements from earlier. Make a white box to go behind each image. The size of the box depends on the measurements that you took earlier and where you want to place the image. For example, the box behind the Martin Luther King, Jr. sticker is 1.5″(w) x 1.4375″(h) as that is the measurement for the Holiday/Monthly boxes. Then, I placed the image inside of that white box and left a little border so that the image is not running right up to the white box. The box will be where Cricut cuts the square around the stickers. Make sure each image is set to print not cut. Adjust this in the side bar on the right side. Click the scissors icon and then choose print. Repeat this for all images. Set the white box for each image to cut.
Once everything isplaced correctly, then attach and flatten all of the images. These options are located at the bottom right of the side bar in Cricut Design Space.
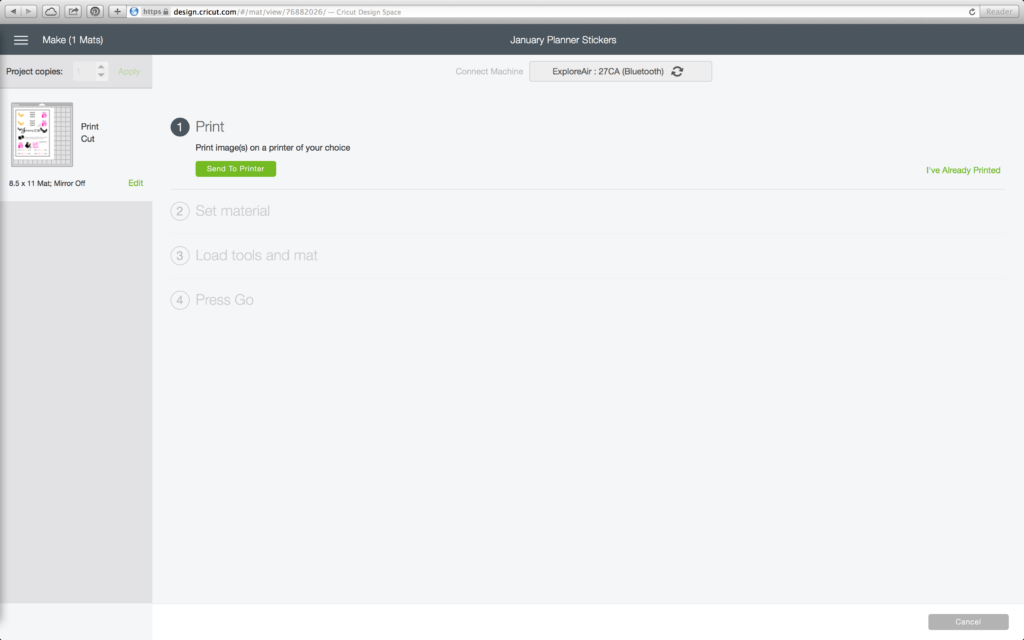
Printing the Stickers
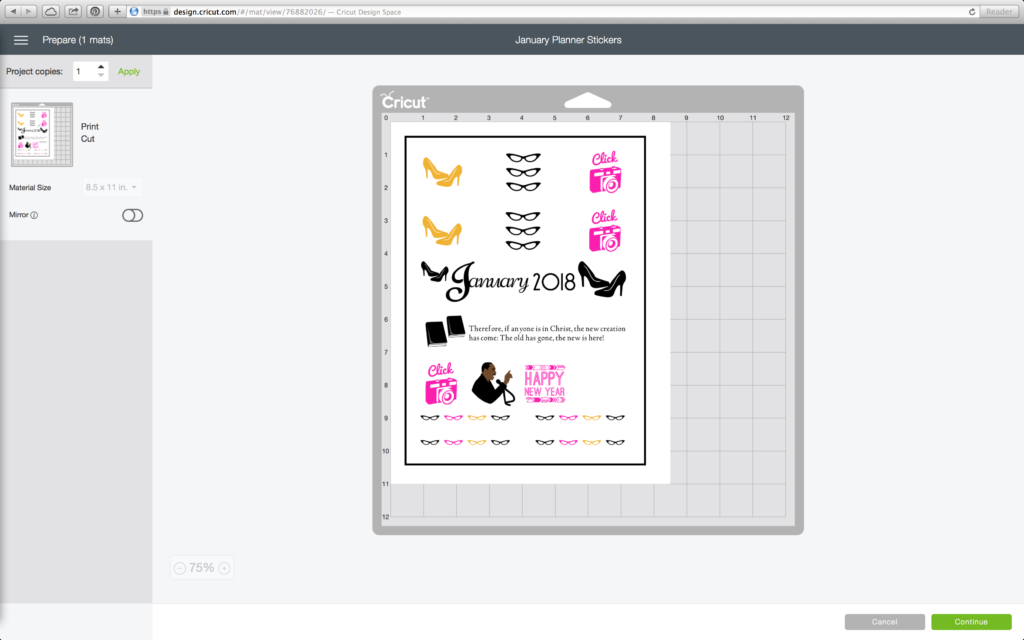
Refer to your printer manual when loading the Cricut Sticker Paper so that it prints on the correct side. When you click “Make It” you will have the option to print first. Once your stickers are printed then place the page on the mat (Cricut watermark down) and follow the prompts on the screen. I used “Cardboard 80lb” instead of the Cricut Sticker Paper option, as this seemed to cut through the paper better.
Once the stickers are printed you will notice that there is a black box around the image. This is what the Cricut Explore Air will use to determine where to cut. Because of the way we have set up this project, it will cut around the white box that is around the images. So the images will be rectangles and squares as opposed to cutting around the shape of the images.
After the Cricut Explore Air is finished cutting the stickers, it is time for you to place them in your planner!

Be sure to #TheDivaIncMagazine if you recreate this tutorial or any of the other tutorials that are in the Magazine or on YouTube. XOXOXO Have fun with your Cricut! Happy Holidays!
This is a sponsored conversation written by me on behalf of Cricut. The opinions and text are all mine.

6 comments
what fun, I have yet to try stickers with my Cricut
This was my first time but I definitely have more planned. 🙂
Ohhh what a fun idea!
Thank you so much Gina!
Such a great way to personalize your planner!
Thank you Blanca! It was fun and super easy.:-)