This is a sponsored conversation written by me on behalf of Cricut. The opinions and text are all mine.
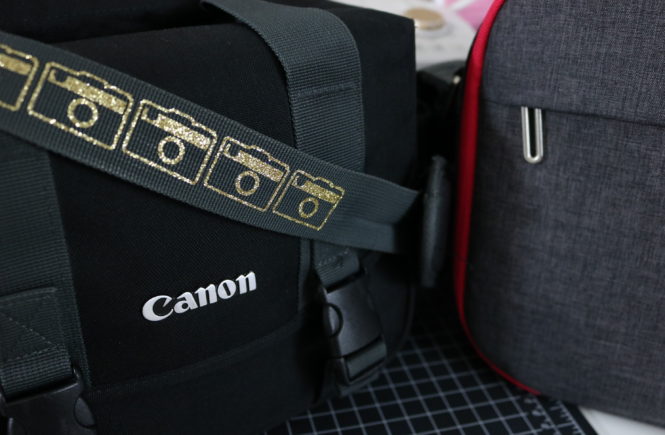
I love camera’s and I love that usually they will come with some sort of case. Especially when you buy a package deal. But what I don’t love is that the camera bags are usually black and boring.
So I had an idea! What if I DIY my camera strap using Cricut Glitter Iron-on? Oh if you could have seen my excitement. I’m not sure what my camera strap is made of, but I figured I would give it a shot.
Grab your Cricut, Glitter Iron-on, EasyPress 2 and follow along with me as I show you how I added a bit of bling to my Camera strap.
What you will need:
If you would like to use my camera design, you can find it here in Cricut Design Space (CDS). I measured my camera strap to make sure that the image would fit in the area I wanted the iron-on to be placed. You will need to measure your camera strap and adjust the size of the image I shared if necessary.
Once you have loaded your design (or mine if you are using it), then click “Make It” in CDS and make sure you turn on the Mirror option.
Next, load your Cricut Glitter Iron-on shiny side down onto the standard grip mat.

After your Cricut Explore Air 2 is finished cutting, use your Cricut Bright Pad and weeding tools to weed the image. Once your image has been weeded, place the image on the camera strap to get an idea of placement.

For this, I used the EasyPress 2 settings for Canvas and adjusted from there.

Follow the settings noted above. Due to the texture on my camera strap, I did go over the strap again with 30 more seconds of pressure.

Cricut Glitter Iron-On is warm peel so give it a few seconds to cool off a bit and you can peel it warm.

Now my camera strap is not so boring thanks to my Cricut!

And thanks to the EasyPress 2 tote, I can put away my EasyPress with ease (you see what I did there?) and make room to start the next project. I think next I will try to experiment with how to use my Cricut Glitter Iron-on on the camera bag itself. That should prove interesting and fun!
Until next time…


